This is a series on the latest 2.* .Net Core bits, Following on from the original .Net Core Series
- Getting Started <=(We are here)
- What’s in the box
- Using Multiple Projects
- Testing
- NuGet
- Multi-targeting
- Publishing Portable Applications
- Self-contained Applications
(At the time of writing, 2.0.3. I use windows, you don’t have to!)
Introduction
I originally wrote a series on .Net Core when it was still a 1.* version. Now there is a 2.0, they have changed/fixed so much that it is truly a 2.0 version, that you can and should use for everything .Net. I will (probably) be only showing instructions from on Windows, but all dotnet CLI instructions should be cross-platform. Let’s get into it!
While written from the point of sdk 2.0, these details should still apply to 2.1, 2.2 and so on as the sdk develops. Updates will be noted if anything drastic has changed.
Installation
TL;DR => Just Install following the instructions here: https://www.microsoft.com/net/download
This URL is fun spoke rather than written, dot.net (dot dot net). This is where you go to get started.
Dotnet supports multiple versions side by side. Get 2.0 installed and you can get started following along with me.
To check you have the correct version to follow along you can open a command line and type ‘dotnet –version’.
> dotnet --version
2.0.3
dotnet (CLI)
Ok, so you could just go RTFM. But I will still go ahead and produce the Hello World of dotnet applications. The internet will be full soon, I might as well do my bit.
Firstly, like with git, we create a new folder and initialise it. In this case, the folder is the equivalent of a project folder.
The command to create a project is dotnet new [options]. If you try to just run dotnet new (like your used to) you might see this:
Getting ready...
Usage: new [options]

Options:
  -h, --help          Displays help for this command.
  -l, --list          Lists templates containing the specified name. If no name is specified, lists all templates.
  -n, --name          The name for the output being created. If no name is specified, the name of the current directory is used.
  -o, --output        Location to place the generated output.
  -i, --install       Installs a source or a template pack.
  -u, --uninstall     Uninstalls a source or a template pack.
  --type              Filters templates based on available types. Predefined values are "project", "item" or "other".
  --force             Forces content to be generated even if it would change existing files.
  -lang, --language   Specifies the language of the template to create.


Templates                                         Short Name       Language          Tags
--------------------------------------------------------------------------------------------------------
Console Application                               console          [C#], F#, VB      Common/Console
Class library                                     classlib         [C#], F#, VB      Common/Library
Unit Test Project                                 mstest           [C#], F#, VB      Test/MSTest
xUnit Test Project                                xunit            [C#], F#, VB      Test/xUnit
ASP.NET Core Empty                                web              [C#], F#          Web/Empty
ASP.NET Core Web App (Model-View-Controller)      mvc              [C#], F#          Web/MVC
ASP.NET Core Web App                              razor            [C#]              Web/MVC/Razor Pages
ASP.NET Core with Angular                         angular          [C#]              Web/MVC/SPA
ASP.NET Core with React.js                        react            [C#]              Web/MVC/SPA
ASP.NET Core with React.js and Redux              reactredux       [C#]              Web/MVC/SPA
ASP.NET Core Web API                              webapi           [C#], F#          Web/WebAPI
global.json file                                  globaljson                         Config
Nuget Config                                      nugetconfig                        Config
Web Config                                        webconfig                          Config
Solution File                                     sln                                Solution
Razor Page                                        page                               Web/ASP.NET
MVC ViewImports                                   viewimports                        Web/ASP.NET
MVC ViewStart                                     viewstart                          Web/ASP.NET


Examples:
    dotnet new mvc --auth Individual
    dotnet new classlib --framework netcoreapp2.0
    dotnet new --help
Mine might show more than yours. I have some extra templates installed (more on this later). But I digress.
mkdir MyNewApp
cd MyNewApp
dotnet new console
We should now have a new console application created with two files:
- Program.cs
- MyNewApp.csproj
Technically, this is enough for a dotnet app.
Now we can restore dependencies, build and run just by using the ‘dotnet run’ command:
dotnet run
Hello World!
That’s it. The dotnet ‘run’ command will automatically run the ‘restore’ and ‘build’ tasks automatically if it needs to. We have a fully executable .Net Core Application.
Visual Studio
Let’s repeat with Visual Studio now. I have Visual Studio 2017., Even if you don’t, you should still have something similar.
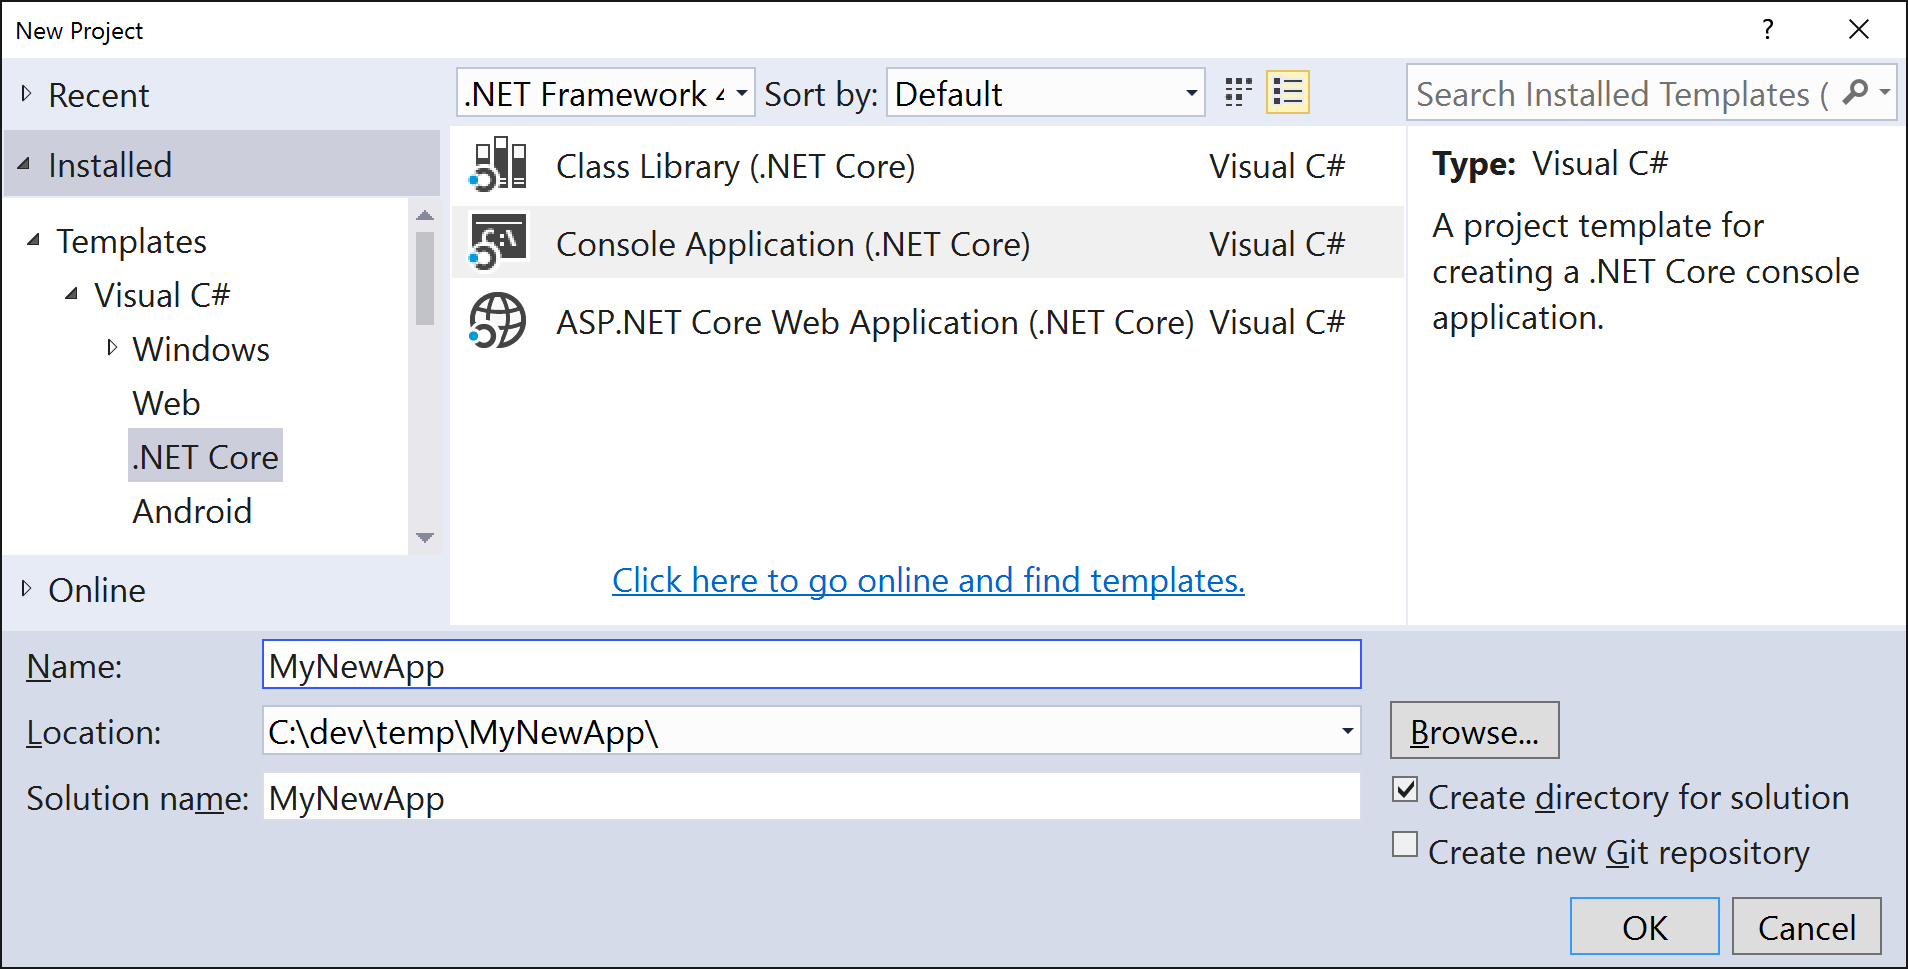
Choose File-> New -> Project and Select the Console Application (.Net Core) template from under the new .Net Core C# category.

This will create a new Solution with a new csproj Project. This is the new slim csproj, which is different to the classic csproj you may be used to. Depending on where you created your project, the folder structure is roughly:
- MyNewApp
- MyNewApp
- MyNewApp.csproj
- Program.cs
- MyNewApp.sln
- MyNewApp
This is practically identical to what ‘dotnet new’ added at the command line.
So now we have a project in Visual Studio. If we build and run, both will succeed and like the command-line counterpart, we see ‘Hello World’ printed out. (Although it might not say open long enough to see it.)
Easy
Next time we will take a deeper look into the *.csproj file and start to experiment on ways to build more complex applications with .Net Core 2.0.