This is part 2 of a series on using the Silverlight Bing Maps Control. If haven’t already, check out part 1.
So Now that you have installed the Bing Maps Silverlight Control, and got yourself a key, you need to add the control to your project. For completeness, lets start by creating a new Silverlight 4 Application Project in Visual Studio 2010, and open up the MainPage.xaml file.
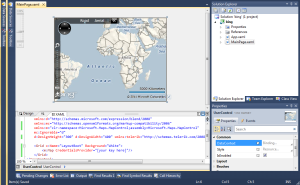
Now before we can add the control, we need a reference to it. If you installed to the default location, go the the solution explorer, right click on the References -> Add Reference. Browse to C:/Program Files(x86)/Bing Maps Silverlight Control/V1/Libraries (or similar) and add the two Dlls, Microsoft.Maps.MapControl.dll and Microsoft.Maps.MapControl.Common.dll. Now we are ready to add the control. Now use the following code to add the map control to your xaml: <m:Map CredentialsProvider="[your key here]"/> as well as adding this to your UserControl: xmlns:m="clr-namespace:Microsoft.Maps.MapControl;assembly=Microsoft.Maps.MapControl" and your done!

Just be sure to replace [your key here] with the actual key from the last tutorial. Seriously, its that easy to create the simplest Bing Maps Silverlight app. The next step is to make it more interesting, customise it at a bit, and make it more useful.
For more information on creating simple Bing maps in Silverlight (and where I got most of this tutorial info from, what little there is :p ) check out this msdn article.