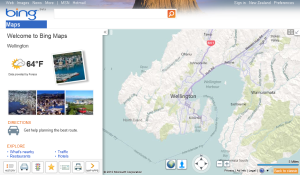
Over the last month or so I have has the opportunity to develop using the Bing Maps Control for Silverlight, and thought it appropriate to share this experience as well as a bit of a ‘how to’ on using it. I plan for this to be a bit of a series based on the following items: - Downloading and Installing the Tools.
- Add a Simple map to your application.
- Using Bing Services
- Customising the Map Control
- Using Custom MapTileSources
Hopefully I will cover these off over the next few weeks. So to begin, lets start with the Downloading and Installing all the required files and tools.
I will assume you already have Visual Studio 2010 Full or Express, and have installed the Silverlight Tools .
If you just want a quick preview of what is possible and what the control can do, or just feel liking playing with the bing maps control, head to the Bing Maps Website and play around with the Silverlight version (not the javascript one), and check out a few of the Map Apps. Everything you see there is achievable with the Maps Control, some of it just requires more work than others. For a more developer centric view of this control, and some code samples and such, check out the Bing Maps Silverlight Control Interactive SDK, which is similar to the Silverlight Toolkit Demo. Both support Out-Of-Browser installation for convenience. This is a great way to familiarise yourself with what this control can do.
To install the control, head to the microsoft download page to download the Bing Maps Silverlight control installer. Run this and follow the instructions to install. This gives you the required dlls as well as as some documentation in the form of a chm file. To use the Bing Maps Control, you need to provide it with a key. This key is an identifier for your application, and allows for tracking usage. Without a valid key, your control wont function.
First things first, create a Bing Maps Developer Account. Head to the Bing Maps Account Center at https://www.bingmapsportal.com. Simply click the Create button to create a new Windows Live User. If you already have a windows live account, use the Login button instead. Follow the instructions to create an account, entering all the required information. After entering your account details such as name and email, and accept the Terms of use. Once all that stuff is out of the way, you can create a new key using the Create or view keys Task on the left menu. Enter the details and follow instructions to produce your shiny new app key for your map. I would suggest using the Developer or Evaluation/Trial Application Type for the purposes of following this series, or else whichever options suit your purposes best. This key will help record the usage of your control which can be monitored and reported on using the Usage Reports. There is more information on this here.
So thats everything we need to set up to get started on using the Control! For more information about the Bing Maps Silverlight Control, check out the documentation online, specifically the pages for getting a key, and information about using the key.
Next I will go over using your newly downloaded control and key to add a Bing Map to your Silverlight application.
